A Practical Guide to Choosing Rubber Flooring for Classrooms
Explore the best rubber flooring for classrooms. Our guide covers safety benefits, types, installation, and maintenance for a durable, quiet learning space.
Choosing the right classroom flooring is a critical investment that impacts student safety, their ability to focus, and the long-term health of your school's budget. While traditional options like vinyl or carpet have been used for years, modern rubber flooring for classrooms offers a powerful trio of benefits that actively solve some of the biggest challenges in a learning environment: superior slip resistance, durability, and noise reduction. This guide will walk you through how to leverage these benefits to create a better, safer, and more effective learning space.
Why Rubber Flooring Is a Smart Choice for Schools
As a school administrator or facility manager, you're constantly juggling budgets, maintenance, and the absolute need to create a safe, productive space for students. For years, the go-to choices were vinyl composite tile (VCT) and carpet, but both have serious downsides in a classroom packed with active children. This is where rubber flooring for classrooms shines as a high-performance alternative.
Upgrading to rubber flooring is like putting premium, all-weather tires on the school bus instead of cheap, bald ones. While old VCT gets the job done, rubber flooring does it with built-in safety features, better acoustics, and the kind of durability that stands up to years of classroom chaos.
The Shift Toward Performance and Safety
A surprising number of school buildings in America are over 50 years old, many filled with materials that don't meet today's safety and health standards. Old vinyl tiles can peel, creating trip hazards, and some legacy materials off-gas unhealthy compounds. Rubber flooring tackles these problems head-on, providing a seamless, resilient, and modern surface.
This isn't just a niche trend. The global rubber flooring market was valued at around USD 1.02 billion in 2024 and is projected to reach USD 1.38 billion by 2030. A huge driver of this growth is demand from educational institutions where safety and long-term value are non-negotiable. To dive deeper into the market trends, you can explore this comprehensive rubber flooring market report.
How Rubber Flooring Transforms the Classroom Environment
| Key Benefit | Impact on Classroom Environment | How You Achieve This Benefit |
|---|---|---|
| Exceptional Safety | Fewer slips, trips, and injuries from falls. | Select a textured rubber surface to maximize grip and a thickness of 8mm+ to cushion falls, especially for younger students. |
| Superior Durability | Withstands heavy foot traffic, desks, and dropped items. | By choosing a high-density rubber, you get a floor that resists dents and scuffs, drastically reducing repair and replacement costs. |
| Acoustic Dampening | Absorbs noise from chatter, shuffling feet, and scraping chairs. | Installing rubber flooring naturally muffles ambient sound, lowering distraction and helping students and teachers focus better. |
| Hygienic Surface | Non-porous material is easy to clean and disinfect. | A simple daily sweep and weekly mop with a neutral cleaner prevents germ buildup, promoting a healthier environment with better air quality. |
| Comfort Underfoot | Provides cushioning that reduces leg and back fatigue. | The natural elasticity of rubber offers ergonomic support, improving comfort for teachers who are on their feet all day. |
As you can see, the benefits are directly tied to creating a better, more effective learning atmosphere that you can actively engineer through smart product choices.
A Practical Solution for Everyday Classroom Problems
The advantages of rubber flooring solve real, everyday problems that wear down students and teachers. It’s more than just a surface; it's an active part of a better educational experience.
Rubber flooring is an investment in the entire learning ecosystem. By reducing distractions from noise and minimizing risks from falls, it helps create an environment where students can focus and educators can teach more effectively.
Here’s how its core strengths deliver tangible benefits in the classroom:
- Benefit: Superior Safety. Its natural grip and cushioned surface mean that when a tumble happens, it's less likely to result in a serious injury.
- Benefit: Unmatched Durability. It handles years of foot traffic, scraping chairs, and dropped science projects without chipping or cracking. This means your maintenance budget can breathe a sigh of relief.
- Benefit: Powerful Noise Reduction. The material naturally absorbs sound. The constant low-level hum of shuffling feet and background chatter gets muffled, creating a noticeably quieter and more focused room.
Understanding the Benefits for Your Learning Environment
When you're choosing flooring, it’s a decision that goes far beyond aesthetics. The right choice directly impacts student safety, concentration, and your school's budget. Think of rubber flooring for classrooms not as a purchase, but as a strategic investment into the foundation of a great learning space. Let's break down how you can leverage its three key pillars: safety, acoustics, and long-term value.
Pillar 1: Enhanced Safety and Comfort
In any school, safety is paramount. Classrooms are buzzing with energy, and with all that movement, the risk of a slip or a fall is always present. Rubber flooring's natural texture provides incredible grip, dramatically cutting down on accidents. Its inherent cushioning acts like a built-in safety net, absorbing a significant amount of impact during a fall and reducing the chance of injury.
Real-World Example: Imagine a reception classroom during an art session where a child spills paint water. On a typical hard, slick floor, that's an instant slip hazard. With rubber flooring, the surface maintains its grip. If a child does stumble, the cushioned floor turns what could have been a trip to the first aid room into a minor hiccup. This combination of slip resistance and shock absorption makes it a smart, proactive choice for busy schools.
Actionable Takeaway: To maximize safety, choose a rubber flooring with a thickness of at least 8mm and a slightly textured finish, especially for classrooms with younger, more active children.
Pillar 2: Superior Acoustics for Better Focus
A noisy classroom is a distracted classroom. The constant hum of shuffling feet, scraping chairs, and dropped pens creates background noise that breaks concentration. Hard surfaces like tile or concrete act like sound mirrors, amplifying every noise. Rubber, on the other hand, is a natural sound absorber, muffling these distracting sounds at the source. The result is a calmer, quieter atmosphere where learning can flourish.
By dampening ambient noise, rubber flooring helps create a space where teachers' instructions are clearer, students can focus more easily, and the overall stress level drops.
This benefit is a game-changer for teachers, too. The ergonomic support from rubber flooring helps reduce fatigue in their legs and back, which makes a massive difference to their comfort and energy. For more on this, check out our guide on how anti-fatigue mats impact your health.
Pillar 3: Remarkable Long-Term Value
At first glance, the initial price for rubber flooring might seem higher than other options. But its real value becomes clear when you look at the total cost over its lifespan. Materials like VCT or carpet might seem like a bargain upfront, but they come with a hefty price tag in ongoing maintenance.
Real-World Cost Comparison: Consider a school with 20 classrooms. With VCT flooring, the annual bill for stripping and waxing alone can easily run into thousands of pounds for labour and supplies. Over ten years, that cost can skyrocket to £50,000 or more. In contrast, rubber flooring requires only a routine sweep and a mop with a pH-neutral cleaner. By choosing rubber, that same school could slash its floor maintenance budget, freeing up thousands to be spent on books, technology, and other student resources. This incredible durability and low-maintenance design makes rubber flooring the fiscally responsible choice.
Selecting the Right Rubber Flooring for Your School
Choosing the right rubber flooring for classrooms is about more than just picking a colour. It’s a decision that impacts installation, maintenance, and long-term performance. You’ll generally find three main options: tiles, rolls, and interlocking mats. To make the best call, you need to balance budget, installation logistics, and what each specific room needs.
Comparing Rubber Flooring Formats
Getting to grips with the unique pros and cons of each format is the first step toward a smart, practical decision that will serve your school for years.
| Flooring Type | Best For | How to Leverage Its Advantage | Potential Downside |
|---|---|---|---|
| Rubber Tiles | Custom designs and easy repairs | Create checkerboard patterns or zoned areas with different colours. If a tile gets damaged, you can replace just that single piece, saving significant time and money. | More seams mean a greater potential for moisture ingress if not sealed properly. |
| Rubber Rolls | Large, open spaces like hallways or big classrooms | Use rolls to achieve a nearly seamless, uniform look that is exceptionally easy to clean and gives a professional finish. | Can be heavy and awkward to install, often requiring professional help. |
| Interlocking Mats | Phased installations or DIY projects | Install these without adhesive for minimal downtime. Your own maintenance team can lay them room by room, avoiding the cost of external contractors. | Seams are more visible and may trap dirt if they aren't fitted tightly. |
Thinking through these options will help you match the right product to your project's goals. For a deeper dive into product selection, you can explore our advice on choosing the right floor mat for your needs.
How to Choose the Right Thickness and Texture
The next decision is thickness and texture. This isn’t a one-size-fits-all choice; the best specs depend on what happens in that classroom.
Thickness for Impact Absorption Think of thickness as the floor's built-in cushioning. A thicker floor provides more shock absorption, which is key for safety and noise reduction. Here’s a quick guide:
- Kindergarten & Early Years (8-10mm): For rooms with young, energetic children, a thicker floor of 8mm to 10mm is best. This extra cushioning softens tumbles and protects joints.
- Standard Classrooms (6-8mm): A thickness of 6mm to 8mm strikes a fantastic balance of comfort, durability, and noise reduction.
- Science Labs & Art Rooms (4-6mm): In spaces where resisting chemicals and spills are priorities, a thinner, denser rubber is often sufficient.
Texture for Slip Resistance The surface texture is your number one defence against falls.
Actionable Tip: Choosing the right texture is a proactive safety measure. A slightly raised or dimpled pattern can significantly improve grip, especially in areas prone to spills, like art rooms or near classroom sinks.
A Practical Application Example
Let's see how this comes together. Imagine a school district planning a summer renovation for a wing that includes ten standard classrooms, two science labs, and a kindergarten room.
- The Strategy: The facility manager decides on interlocking rubber tiles for the project. This allows their in-house maintenance team to handle the installation, saving on labour costs. They can tackle one classroom at a time, minimizing disruption.
-
The Selection:
- For the kindergarten room, they choose 10mm thick tiles with a lightly textured surface to maximize safety.
- For the ten standard classrooms, they opt for durable 8mm tiles.
- In the science labs, they select 6mm tiles from a denser rubber compound known for its chemical resistance.
By tailoring the flooring to each room's function, the school achieves a safer, more practical, and cost-effective result.
Your Guide to a Successful Installation
A premium rubber flooring for classrooms is only as good as its installation. A flawless installation gives you a seamless, safe floor that lasts for years. A rushed job can quickly turn into a nightmare of repairs. Think of it like a foundation: get it right, and the structure will be solid for decades.
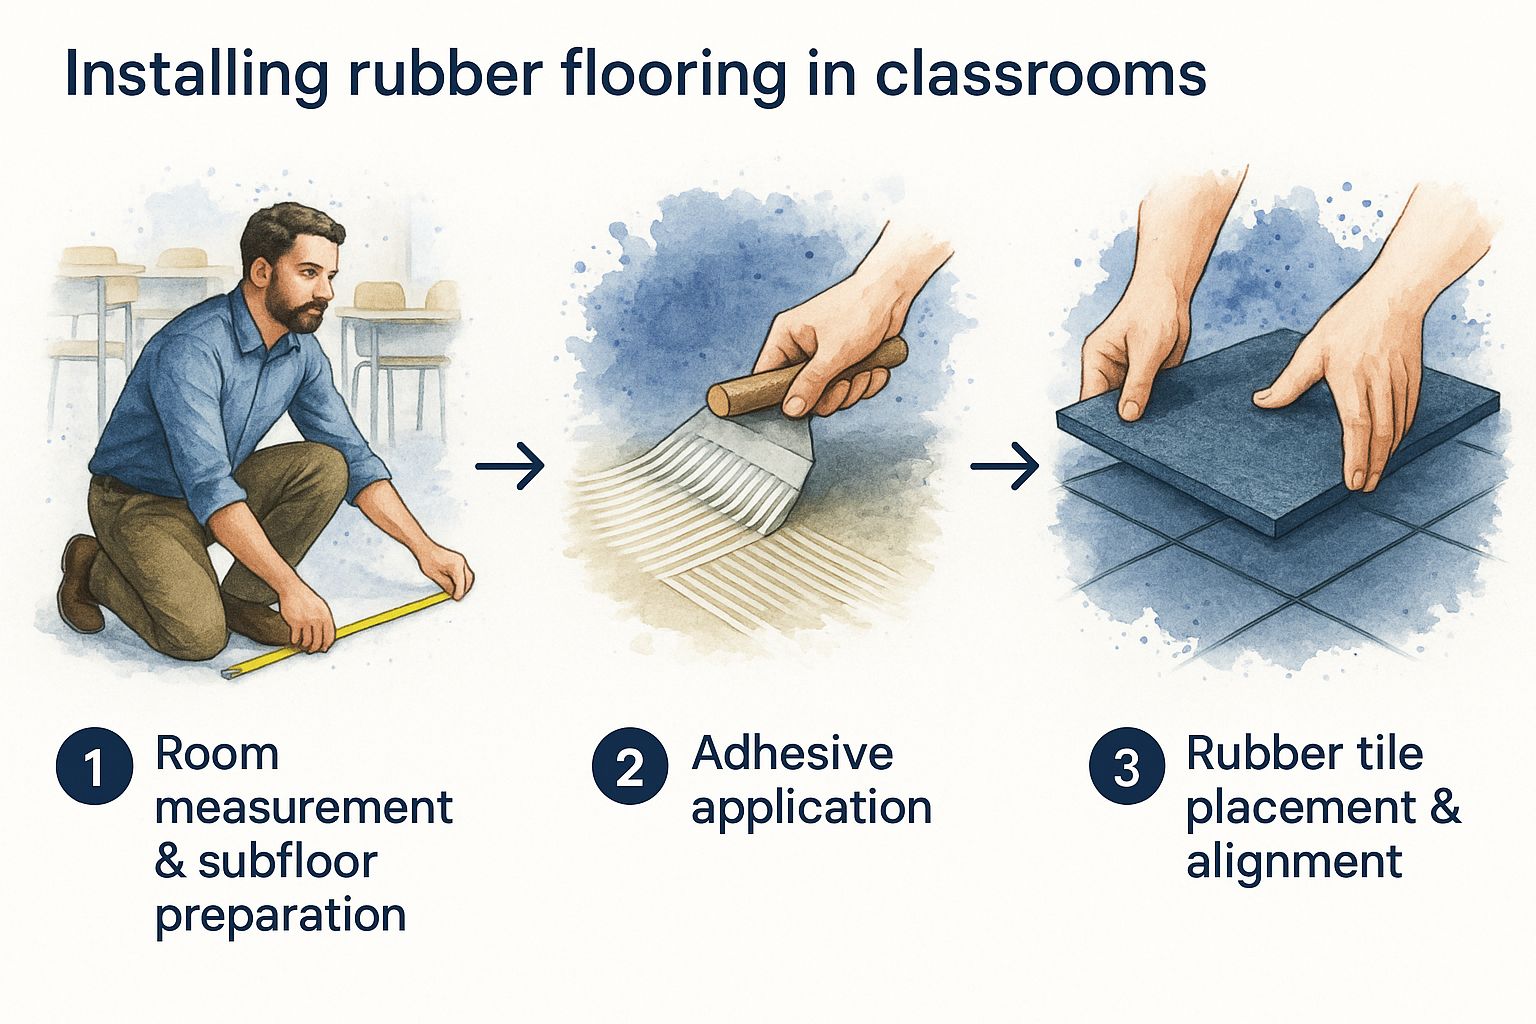
Crucial Pre-Installation Steps
Getting the prep right is critical. Skipping these steps is the most common and expensive mistake. Here’s your pre-flight checklist:
- Subfloor Preparation: The subfloor must be clean, dry, and perfectly level. Remove all debris and old adhesive. Fill and smooth any cracks. A properly prepped subfloor ensures the rubber lays flat and the adhesive bonds correctly.
- Moisture Testing: Moisture is the enemy of flooring. You must test the concrete subfloor for its moisture vapor emission rate (MVER). If levels are too high, the adhesive will fail, leading to bubbles and peeling seams.
- Acclimation: Rubber needs to get used to its new environment. Bring the flooring into the classroom and let it sit for at least 24-48 hours before installation. This allows it to adjust to the room's temperature and humidity, preventing shrinking or expanding after it's laid.
A great installation is a methodical process. Each step logically builds on the one before it.
How to Install Rubber Tiles: A Step-by-Step Example
Let’s get practical. Imagine installing 24x24 inch rubber tiles in a 900 sq. ft. classroom. Here’s a step-by-step guide to achieve a professional finish.
- Find the Center: Measure the room's length and width, then snap chalk lines to pinpoint the exact center. Starting in the middle guarantees that tiles along the walls will be a consistent, balanced size, avoiding thin, awkward slivers.
- Apply the Adhesive: Using the notched trowel recommended by the adhesive maker, spread a thin, even coat of adhesive in one quadrant, avoiding your chalk lines. Pay close attention to the manufacturer's instructions for "flash time"—the waiting period before laying tiles—to ensure a solid bond.
- Lay the First Tiles: Place your first tile precisely at the corner of your chalk lines in the room's center. Press it down firmly. Lay the next tiles snugly against the first, working your way out from the center with zero gaps.
- Make Precise Cuts: At walls or doorways, measure the gap carefully, mark the back of the tile, and use a sharp utility knife with a straight edge for a clean cut.
- Roll the Floor: Once all tiles are down, go over the entire surface with a 100 lb. floor roller. This crucial step ensures every square inch of tile makes solid contact with the adhesive, pushing out trapped air and locking everything in place.
A successful installation boils down to precision and patience. Rushing the adhesive or making sloppy cuts will undermine the project, leading to a floor that looks unprofessional and is set up for early failure.
Common Mistakes to Avoid
- Using the Wrong Adhesive: Always use the specific adhesive recommended by the flooring manufacturer. A generic glue will likely fail.
- Ignoring Cure Time: Keep all foot traffic and heavy furniture off the floor for the time specified by the manufacturer, usually 24-72 hours, to allow the adhesive to cure fully.
- Improper Seam Sealing: If using rolls, seams must be butted together perfectly tight and often welded. Gaps trap dirt and moisture, creating a trip hazard.
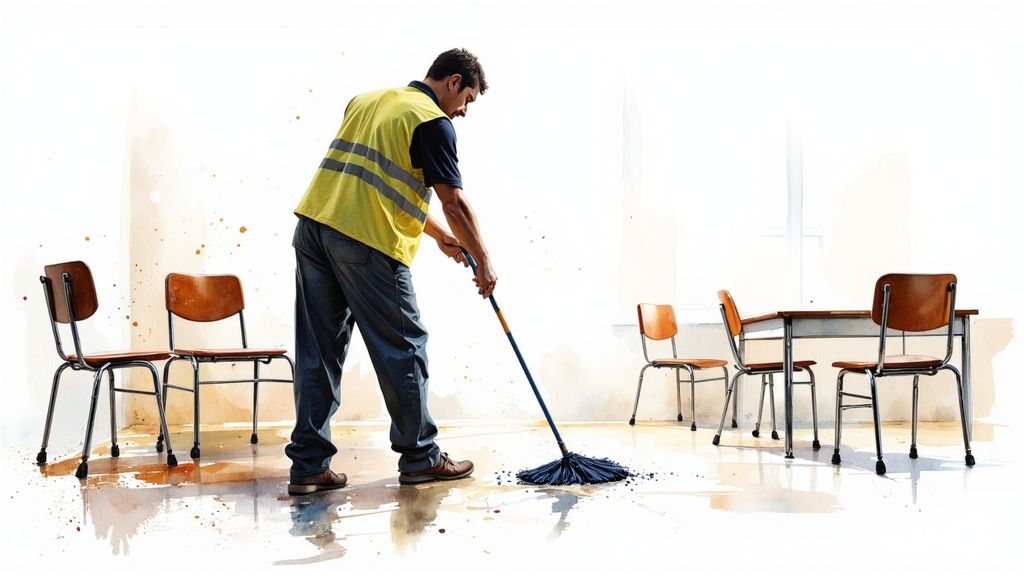
Keeping Your Classroom Floors in Top Condition
Once your new rubber flooring for classrooms is installed, a consistent, simple cleaning plan is all it takes to protect your investment for years. A few minutes of routine care each day prevents dirt buildup, saving you from costly deep cleans and freeing up the maintenance budget for other school needs.
Daily and Weekly Cleaning Routines
Consistency is key. A simple schedule is more than enough to handle classroom chaos. The secret is using the right tools and the right cleaner.
- Daily Care (5-10 minutes): The goal is to remove loose dirt before it gets ground in. A quick pass with a microfiber dust mop collects the abrasive particles that can act like sandpaper. Spot clean any spills immediately with a damp cloth and a pH-neutral cleaning solution.
- Weekly Mopping: This resets the floor. Use a pH-neutral cleaner. Harsh cleaners like bleach, ammonia, or vinegar-based solutions are the enemy of rubber flooring; they can attack the protective finish, causing discoloration or brittleness. Use a two-bucket system (one for cleaning solution, one for clean rinse water) to avoid spreading dirty water.
If you take away only one thing about maintenance, let it be this: avoid harsh chemicals at all costs. A gentle, pH-neutral cleaner is the secret weapon for preserving your floor’s colour, texture, and resilience for its entire lifespan.
The 15-Minute Daily Classroom Floor Care Routine
Here’s a practical checklist for your custodial team to implement:
- Entryway Check (2 Minutes): Shake out and vacuum the entrance mat. Stopping dirt at the door is half the battle.
- Visual Scan (1 Minute): Walk through the room to spot spills, sticky spots, or debris.
- Spot Treatment (3 Minutes): Tackle any issues found. A spray bottle with pre-mixed neutral cleaner and a microfiber cloth is perfect for rapid response.
- High-Traffic Sweep (5 Minutes): Use a microfiber dust mop to clean main pathways—around the teacher's desk, between tables, and by the doorway.
- Final Debris Check (4 Minutes): Use a handheld vacuum or brush and dustpan to grab larger items like paper scraps.
This fast-paced routine focuses effort where it matters most. For more tips, our guide on proper floor mat cleaning techniques offers valuable insights.
Rubber Flooring Maintenance Schedule
| Task | Frequency | Recommended Tools/Products | How-To Tip |
|---|---|---|---|
| Sweep / Dust Mop | Daily | Microfiber dust mop, soft-bristle broom | Focus on high-traffic areas and entryways to prevent dirt from spreading throughout the school. |
| Spot Clean Spills | As needed | pH-neutral cleaner, microfiber cloths | Clean spills immediately to avoid staining and prevent slip hazards. |
| Damp Mopping | Weekly | Two-bucket system, pH-neutral cleaner, microfiber mop | Wring the mop out well to avoid leaving excess water, which can seep into unsealed seams. |
| Check Entrance Mats | Daily | Vacuum cleaner | A clean entrance mat traps up to 80% of dirt before it hits your floor. This is your first line of defense. |
| Deep Clean | Annually or biannually | Auto-scrubber with a soft brush, pH-neutral cleaner | This removes any deep-seated grime and restores the floor's original lustre, extending its life. |
Following a simple schedule like this one is the best way to protect your investment and ensure your rubber floors provide a safe, comfortable surface for years.
The Sustainable Future of School Flooring
When you choose rubber flooring for classrooms, you're making a forward-thinking choice that demonstrates a commitment to green building, environmental responsibility, and creating a healthier space for children. The eco-friendly story of rubber flooring starts with its composition. Many top-quality rubber floors contain high levels of recycled content, often from old vehicle tires. This process transforms millions of tires that would otherwise clog landfills into a high-performance, durable floor for schools.
A Smart Investment Aligned With Global Priorities
Investing in safe, high-quality school buildings is a global priority. North America and Europe lead this charge, making up over half of the global market for rubber flooring. North America alone holds 33.19% of the market share, with the United States responsible for nearly 67% of that. This shows a deep, ongoing commitment to building better learning environments. You can see how regional investments are shaping the flooring industry in more detail here.
Opting for rubber flooring aligns your school with these priorities, placing you at the forefront of safety, health, and sustainability.
By choosing recycled rubber flooring, a school doesn’t just shrink its environmental footprint. It sends a powerful, visible message to the community about its commitment to being a responsible steward of our planet. It becomes a real-life lesson in sustainability for every student.
Longevity That's Good for the Planet (and Your Budget)
The incredible lifespan of rubber flooring is a huge part of its green credentials. A well-cared-for rubber floor can easily last for decades, drastically cutting down on the raw materials, energy, and waste associated with frequent replacements.
Here’s a quick breakdown of the sustainable benefits you gain:
- Fewer Replacements: The longer your floor lasts, the less old material ends up in a landfill.
- A Gentler Cleaning Routine: Rubber floors are cleaned with basic, pH-neutral cleaners, avoiding the harsh chemicals required by other flooring types.
- Healthier Air for Everyone: Many rubber flooring options are low-VOC (Volatile Organic Compounds), meaning they release fewer chemicals into the air, creating a healthier indoor atmosphere for students and staff.
This long-lasting nature also benefits your teachers. The natural springiness of rubber offers ergonomic support, a game-changer for educators on their feet all day. If you’re interested in how cushioning reduces strain, take a look at our range of ergonomic and comfortable anti-fatigue mats.
Ultimately, picking rubber flooring is an investment in the next generation of healthy, responsible, and future-proof schools.
Your Top Questions About Classroom Rubber Flooring, Answered
When you're considering a major upgrade like new flooring, you need clear, practical answers. Here are the most common queries we hear from facility managers and school administrators about rubber flooring for classrooms.
How Does the Cost Compare to VCT or Carpet?
While rubber flooring can have a higher initial purchase price than VCT or commercial carpet, the real win comes from its low total cost of ownership. VCT, for example, requires constant, expensive maintenance—regular stripping, waxing, and buffing. These recurring labor and material costs add up significantly over time. Rubber flooring, in contrast, only needs a simple sweep and a mop with a pH-neutral cleaner.
A Real-World Scenario: A school might find that rubber flooring costs 20-30% more per square metre upfront compared to VCT. However, they will quickly realize savings of over 75% on annual maintenance costs. Over a 15-20 year lifespan, rubber flooring becomes the smarter financial choice, not just the better floor.
Can Rubber Flooring Really Handle Heavy Classroom Use?
Absolutely. This is where rubber flooring excels. It is engineered to thrive in the chaos of a busy school day.
- Heavy Furniture: Its high-density composition resists dents and gouges from desks, bookcases, and heavy rolling carts.
- Constant Foot Traffic: It is designed to withstand the endless movement in hallways and classrooms without wearing thin.
- Dropped Objects: It absorbs impacts from heavy textbooks, art supplies, and science equipment that would easily chip or crack harder flooring.
Is Rubber Flooring Difficult to Clean and Maintain?
Not at all. Its low-maintenance nature is a major benefit for busy schools. The non-porous surface means dirt, spills, and allergens can't seep in, making it exceptionally easy to keep clean and hygienic. Your daily routine is a quick sweep or dust-mop, and a weekly damp mop with a pH-neutral cleaner is all it takes. Unlike carpet, it doesn’t trap dust or stains. And unlike VCT, there is absolutely no waxing or polishing required. This simple process also promotes excellent indoor air quality—a huge benefit for students and staff with allergies or asthma.
Ready to create a learning environment that’s safer, quieter, and built to last for decades? The team here at Mats4U has been helping schools find their perfect flooring solutions for over 50 years. We know what works. Take a look at our extensive range of rubber flooring options and get in touch for a custom quote today.
Prev post

Your Actionable Guide to High-Impact Gym Floor Protection
Updated on 28 July 2025
Next post

A Complete Guide to Commercial Door Mats
Updated on 26 July 2025