


Did you know that dirty rubber mats can collect up to 30 times more bacteria than a toilet seat? Keeping these mats clean is not just about appearance. It actually helps protect your health and keeps your space fresh. This step by step process will show you simple and safe ways to make your rubber floor mats last longer and stay sanitary with minimal effort.
Table of Contents
- Step 1: Gather Cleaning Supplies For Rubber Mats
- Step 2: Remove Excess Dirt And Debris Effectively
- Step 3: Apply Suitable Cleaning Solution Thoroughly
- Step 4: Scrub And Rinse Rubber Mats Properly
- Step 5: Inspect And Dry Rubber Floor Mats Completely
Quick Summary
| Key Point | Explanation |
|---|---|
| 1. Gather all necessary cleaning supplies | Collect essential tools like a vacuum cleaner, soft brush, and microfiber cloths for efficient cleaning of rubber mats. |
| 2. Remove loose dirt before deep cleaning | Use a vacuum with a soft brush attachment to effectively remove dust and debris from the mat surface. |
| 3. Apply a suitable cleaning solution | Use a disinfectant cleaner specifically for rubber mats, following manufacturer instructions for proper dilution and application. |
| 4. Scrub thoroughly to lift embedded dirt | Use a soft bristled brush to scrub the mat, focusing on tough stains and high traffic areas, then rinse with clean water. |
| 5. Dry mats completely to prevent damage | Use microfiber cloths to absorb moisture and allow mats to air dry to prevent mold, mildew, and slipping hazards. |
Step 1: Gather Cleaning Supplies for Rubber Mats
Preparing the right cleaning supplies is essential for effectively maintaining your rubber floor mats. In this step, you will collect all the necessary tools and products to ensure a thorough and safe cleaning process.
According to research from the Institute for Environmental Education and Research, the key supplies you will need include a vacuum cleaner, soft bristled brush, microfiber cloths, a mop and bucket, disinfectant cleaner, mild soap, spray bottle, and clean water. Having these items ready before you start will make your cleaning process smooth and efficient.
Here’s a summary of essential supplies for cleaning rubber mats:
| Cleaning Supply | Recommended Type | Purpose |
|---|---|---|
| Vacuum Cleaner | With soft brush attachment | Remove loose dirt and debris |
| Soft Bristled Brush | Medium length bristles | Scrub tough dirt and stain removal |
| Microfiber Cloths | 2-3 clean cloths | Drying and wiping surfaces |
| Mop and Bucket | Standard with wringer | Applying and rinsing cleaning solution |
| Mild pH Neutral Detergent | Example: Joy, Ivory Liquid | Gentle cleaning without damaging rubber |
| Spray Bottle | Clean plastic | Evenly distributing cleaning solution |
| Clean Water | Cool or lukewarm | Rinsing and diluting cleaning products |
| Disinfectant Cleaner (Optional) | For rubber surfaces only | Sanitizing and killing germs |
Start by gathering these specific items:
- Vacuum cleaner with soft brush attachment
- Soft bristled brush (preferably with medium length bristles)
- Microfiber cloths (2 3 clean cloths)
- Mop and bucket
- Mild pH neutral detergent (like Joy or Ivory Liquid)
- Spray bottle
- Clean water
- Optional: Disinfectant cleaner appropriate for rubber surfaces
Pro Tip: Always check manufacturer recommendations for your specific rubber mat type before using any cleaning products to prevent potential damage.
By preparing these supplies in advance, you will be ready to move on to the actual cleaning process with everything within reach. This preparation will help you clean your rubber mats efficiently and protect their longevity.
Ready to start cleaning? Let’s move on to the next step where we will begin the actual cleaning process.
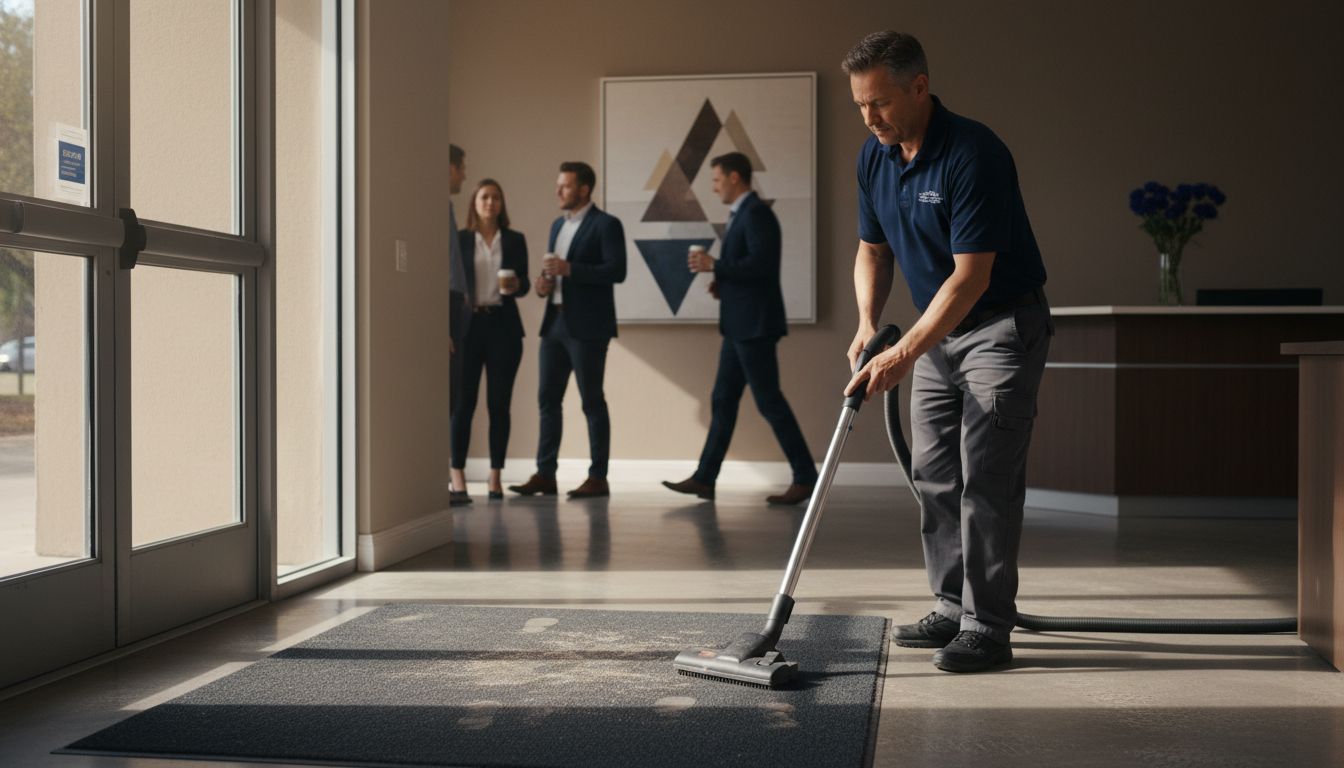
Step 2: Remove Excess Dirt and Debris Effectively
Now that you have your cleaning supplies ready, it is time to tackle the first crucial stage of cleaning rubber floor mats: removing loose dirt and debris. This initial step will ensure a more effective and thorough cleaning process.
According to research from the Institute for Environmental Education and Research, you should begin by vacuuming or sweeping the mat to remove loose dirt, dust, and debris. Pay special attention to corners and edges where dirt tends to accumulate.
Follow these steps for optimal dirt removal:
- Start with a vacuum cleaner equipped with a soft brush attachment
- Move the vacuum slowly across the entire surface of the mat
- Use gentle back and forth motions to capture embedded particles
- Focus extra time on high traffic areas and mat edges
- For stubborn dirt or tight corners, switch to your soft bristled brush
Pro Tip: Hold the vacuum attachment slightly above the mat surface to prevent potential scratching or damaging the rubber material.
As recommended by the General Services Administration, after vacuuming, you can also use a soft brush to sweep away any remaining loose dirt. This two step approach ensures you remove as much debris as possible before moving to deeper cleaning methods.
With the loose dirt now removed, you are ready to progress to the next stage of your rubber mat cleaning process.
[Learn more about cleaning rubber floors] to maintain your mats in top condition.
Step 3: Apply Suitable Cleaning Solution Thoroughly
With the loose dirt removed, you are now ready to apply a cleaning solution that will deep clean and sanitize your rubber floor mats. This critical step will help eliminate germs, stains, and embedded dirt that vacuuming alone cannot remove.
According to research from the Institute for Environmental Education and Research, you should use a disinfectant cleaner specifically designed for gym or industrial mats. These specialized cleaners are effective against common bacteria and viruses and can be applied using either a spray bottle or mop.
Here are the key steps for applying your cleaning solution:
- Dilute your cleaning solution according to manufacturer instructions
- Fill a clean bucket with the prepared solution
- If using a spray bottle, ensure an even light mist across the mat surface
- For larger mats, use a microfiber mop for consistent application
- Work in small sections to maintain control and prevent oversaturation
Pro Tip: Always test your cleaning solution on a small hidden area first to ensure it does not discolor or damage the rubber material.
As recommended by the General Services Administration, when using a mop, dip and thoroughly wring out the mop to prevent excess water from pooling on the rubber surface. This technique ensures an even application while preventing potential water damage.
Once you have applied the cleaning solution, you will be prepared for the next crucial step in the mat cleaning process.
[Check out our guide on cleaning rubber flooring] for additional professional maintenance tips.
Step 4: Scrub and Rinse Rubber Mats Properly
Now that you have applied the cleaning solution, it is time to thoroughly scrub and rinse your rubber mats to ensure a deep and effective clean. This step will help remove stubborn dirt and ensure no cleaning solution residue remains.
According to research from the Institute for Environmental Education and Research, after applying the cleaning solution, you should scrub the mat with a soft bristled brush to tackle tough dirt and stains. Focus on areas with visible grime or high traffic zones that accumulate more dirt.
Follow these key steps for effective scrubbing and rinsing:
- Use your soft bristled brush with gentle circular motions
- Apply moderate pressure to lift embedded dirt
- Work systematically across the entire mat surface
- Pay extra attention to corners and edges
- Rinse your brush frequently to prevent spreading dirt
Pro Tip: Always use light to moderate pressure when scrubbing to avoid damaging the rubber surface.
As recommended by the General Services Administration, use a second pail of clean cool or lukewarm water to rinse your mop or cleaning tool. This ensures you remove all cleaning solution and prevent any potential residue buildup.
Once you have completed scrubbing and rinsing, your rubber mats will be well on their way to looking fresh and clean.
[Explore our comprehensive guide on cleaning rubber mats] for additional professional maintenance insights.
Step 5: Inspect and Dry Rubber Floor Mats Completely
With the cleaning process nearly complete, it is time to carefully inspect and thoroughly dry your rubber floor mats. This final stage ensures your mats are not only clean but also protected from potential moisture related damage.
According to research from the Institute for Environmental Education and Research, you should use microfiber cloths to wipe the mats dry, ensuring no moisture remains. This critical step prevents potential mold and mildew growth that can compromise your mat’s integrity and appearance.
Follow these comprehensive drying and inspection steps:
- Use clean microfiber cloths to absorb excess moisture
- Gently pat and wipe the entire mat surface
- Check for any remaining dirt or cleaning solution residue
- Inspect the mat for any signs of wear or damage
- Allow the mat to air dry in a well ventilated area
Pro Tip: Position fans or use a clean dry towel to speed up the drying process and prevent water spots.
As recommended by the General Services Administration, thoroughly drying the mat prevents potential slipping hazards and maintains the rubber material’s long term durability. Take your time during this process to ensure every section is completely dry.
Once your rubber mats are fully inspected and dried, they will look refreshed and ready for immediate use.
[Discover more in our step by step guide to cleaning car rubber floor mats] for additional maintenance insights.
Keep Your Rubber Mats Spotless with the Right Solutions
Cleaning rubber floor mats is essential to maintain their durability and appearance. This article highlights the challenges of removing embedded dirt, stains, and germs while protecting your mats from damage. If you want to achieve professional results without worry, having the right mats and cleaning accessories is key. At Mats4U, we understand how important it is for commercial and industrial spaces to have reliable flooring solutions that stand up to heavy use and simplify maintenance.
Explore our wide selection of Commercial Mats designed for high-traffic areas, offering durability and easy cleaning. Complement your routine with quality Accessories like brushes and cleaning tools to make maintenance effortless. Ready to invest in mats that make cleaning easy and hassle free Visit Mats4U.com today to find the perfect fit for your space and take advantage of free delivery on orders over $100. Don’t wait let your mats work for you by keeping your environment clean and professional.
Frequently Asked Questions
How do I remove loose dirt from rubber floor mats?
To remove loose dirt from rubber floor mats, start by vacuuming or sweeping the mat thoroughly. Use a vacuum cleaner with a soft brush attachment and make slow, back-and-forth motions to capture dust and debris, focusing on corners and high-traffic areas.
What cleaning solution should I use for rubber floor mats?
Use a mild pH neutral detergent designed for rubber cleaning. Dilute the detergent according to the instructions, then apply it using a spray bottle or mop to ensure an even application, working in small sections for best results.
How do I effectively scrub rubber floor mats?
To effectively scrub rubber floor mats, use a soft bristled brush with circular motions. Apply moderate pressure to lift embedded dirt, paying extra attention to high-traffic zones and corners to ensure a thorough clean.
What steps should I follow to dry rubber floor mats?
To dry rubber floor mats, use clean microfiber cloths to absorb excess moisture and gently wipe the entire surface. Allow the mats to air dry in a well-ventilated area, or use fans to speed up the drying process and prevent water spots.
How can I prevent mold and mildew on my rubber mats?
To prevent mold and mildew on rubber mats, ensure they are completely dried after cleaning. Wipe the mats with microfiber cloths to absorb moisture, and inspect them regularly to catch any signs of dampness or residue build-up.
What should I look for when inspecting my cleaned rubber mats?
When inspecting your cleaned rubber mats, look for any signs of remaining dirt, cleaning solution residue, or wear and tear. This step ensures that your mats are not only visually clean but also free of damage that could affect their lifespan.
Recommended
- A Practical Guide to Cleaning Rubber Floor Surfaces – Mats4U USA
- Mastering Car Rubber Floor Mat Cleaner: A Step-by-Step Guide – Mats4U USA
- How to Clean Rubber Floors: A Practical Step-by-Step Guide – Mats4U USA
- The Ultimate Guide to Cleaning Rubber Flooring for Longevity and Safet – Mats4U USA
- Always Clean Detailing: Perfect Car Care


