


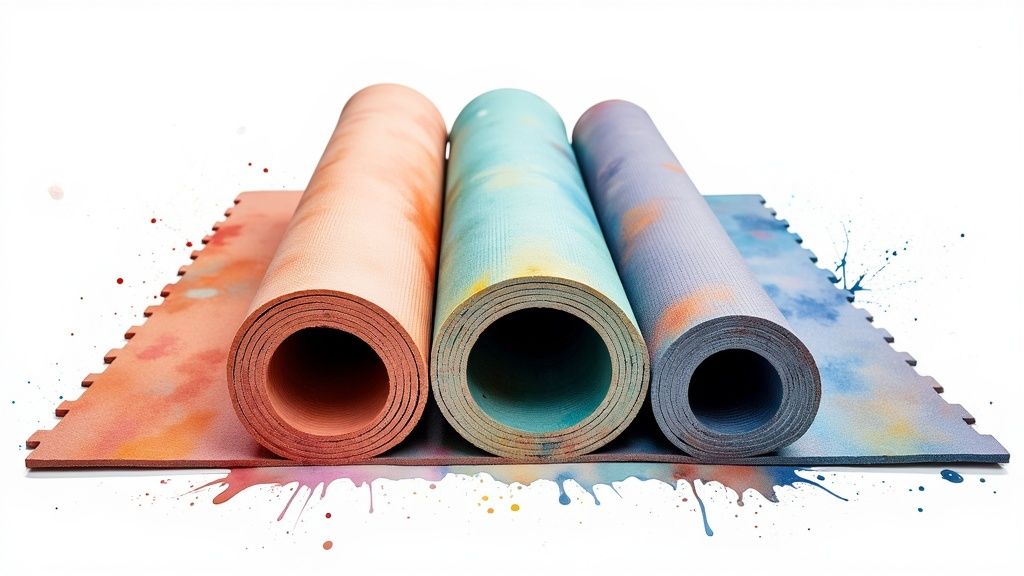
The best gym matting isn't a single product—it’s a specific solution for your space, your workouts, and your goals. For serious lifting zones, the clear, practical choice is thick vulcanized rubber (20-30mm) for maximum subfloor protection. Cardio areas, on the other hand, benefit from durable and easy-to-clean 8mm rubber rolls. And for versatile home studios where activities vary, interlocking foam or rubber tiles offer an adaptable, DIY-friendly solution.
Matching Your Matting to Your Mission
Before you even look at a single product spec, you need to get crystal clear on what your flooring needs to do. This isn't about finding a generic, one-size-fits-all mat. It's about matching the material, thickness, and design to the real-world demands of your gym. Getting this step right prevents premature wear, protects your expensive equipment, and can save you thousands in subfloor repairs down the line. The direct benefit is a safer, more durable facility that costs less to maintain.
Think of this initial assessment as your blueprint. It's what stops you from overspending on heavy-duty flooring you don't need or, far worse, under-investing and facing costly consequences. A solid foundation is a critical part of any setup, so understanding the full scope of home gym equipment essentials is the first step toward building a space that lasts.
Defining Your High-Impact Zones
First, grab a pen and paper and map out your floor plan. Not all square footage in a gym is created equal. The corner where you'll be deadlifting has wildly different needs than the area where your treadmill will live.
Actionable Step:
- Sketch your layout: Draw the perimeter of your gym space.
- Mark activity areas: Label specific zones like "Free Weights," "Cardio Machines," "Stretching/Yoga," and "Functional Training."
- Assign impact levels: Rate each zone as High, Medium, or Low impact.
Here’s a real-world example of what happens when this step is skipped: a CrossFit box owner installed uniform, 10mm mats across their entire facility to save money initially. Within a year, the concrete subfloor underneath their main lifting platform developed spiderweb cracks from repeated barbell drops. The fix was expensive and disruptive, involving tearing out the floor, repairing the concrete, and finally installing the 30mm shock-absorbing tiles they should have used from the start.
In contrast, a large commercial gym zoned its flooring perfectly for maximum benefit:
- Heavy-Duty Rubber (30mm): Used in the free-weight and powerlifting areas to absorb the massive impact of dropped weights, protecting the subfloor and reducing noise.
- Standard Rubber Rolls (10mm): Used in the general strength training and machine areas to provide durability and stability at a lower cost.
- Durable Vinyl Tiles: Used in the cardio section to handle constant foot traffic and sweat while being extremely easy to clean and maintain.
This strategic approach didn’t just protect their investment—it created a safer, more functional, and cost-effective environment for everyone.
Key Takeaway: Stop thinking of your gym floor as one giant surface. Identify your distinct activity zones and choose a matting solution that can handle the specific abuse each one will take. This planning saves money, prevents damage, and improves safety.
Creating Your Gym Matting Checklist
To precisely define your needs, create a checklist. This simple exercise forces you to think beyond just square footage and get into the practical, day-to-day realities of your space. The global gym mat market is already worth around $1.5 billion and growing, a testament to how crucial quality flooring is. Making the right choice matters.
Your checklist should answer these questions to guide your purchase:
- Primary Activities: What's happening here? Powerlifting, HIIT, yoga, cardio? Benefit: This determines the required shock absorption.
- Heaviest Equipment: What's the heaviest weight that will be dropped, and from what kind of height? Benefit: This dictates the minimum thickness needed to protect your subfloor.
- Foot Traffic: Is this a quiet corner for one person or a main walkway for dozens? Benefit: This informs the durability requirements.
- Acoustic Needs: Do you need to deaden sound and vibration for people downstairs or in the next room? Benefit: Thicker, denser mats significantly reduce noise transfer.
- Subfloor Type: What are you installing on top of? Concrete, wood, or something else? Benefit: This ensures compatibility and proper installation.
By defining your mission before you start shopping, you turn a guessing game into a calculated investment. You'll be ready to choose flooring that protects your members, your gear, and your building for years to come.
A Practical Guide to Matting Materials
The material you choose is the single biggest factor in your floor's performance. It dictates everything from shock absorption and durability to how easy the surface is to clean. Picking the right gym matting starts with understanding what’s going underfoot so you can make a smart, practical choice that directly benefits your operations.
Vulcanized Rubber: The Undisputed Champion
When it comes to pure, raw performance and durability, vulcanized rubber is the industry standard for high-impact zones. This isn't just regular rubber; it's virgin rubber treated with intense heat and pressure, bonding it on a molecular level. The result is a non-porous, incredibly dense surface that easily handles heavy impacts.
This is exactly why you'll see vulcanized rubber in nearly every serious free-weight area.
- Real-World Example: Picture a powerlifter dropping a 400-pound barbell after a max-effort deadlift. The floor has to absorb that force without compressing, tearing, or—worse—damaging the concrete subfloor. Vulcanized rubber does that, day in and day out, protecting the building's structure.
Its non-porous nature is another huge benefit. It won’t soak up sweat, water, or cleaning solutions, making it a far more hygienic and low-maintenance choice for busy commercial gyms. For a deeper dive into all your options, our guide on choosing the right commercial gym flooring is a great resource.
Recycled Rubber: Versatile and Accessible
Recycled rubber is another hugely popular choice, often made from reclaimed materials like old car tires. These mats are produced by binding rubber crumbs together with an adhesive, which makes them an eco-friendly and often more budget-conscious option than their vulcanized cousins.
While it is slightly more porous, high-quality recycled rubber still delivers fantastic durability and shock absorption. It's a brilliant all-rounder for general strength training zones, areas with machines, and home gyms where the impact isn't quite as brutal as a dedicated Olympic lifting platform.
- Real-World Example: A boutique fitness studio uses recycled rubber rolls across its main workout floor. This provides more than enough protection for kettlebell circuits and dumbbell work, all while offering a stable, comfortable surface for functional training and HIIT classes. The benefit is achieving professional-grade performance at a more accessible price point.
Pro Tip: New recycled rubber mats can sometimes have a distinct odor from off-gassing. Don't panic—this is normal. To speed up the process, clean the mats with a pH-neutral cleaner and ensure the room has plenty of ventilation. The smell usually fades within a week or two.
EVA Foam Tiles: Built for Comfort
For areas where comfort and cushioning are the top priorities over extreme impact resistance, high-density EVA (ethylene vinyl acetate) foam tiles are a fantastic solution. These interlocking tiles are lightweight, easy to install, and provide a soft surface that's much gentler on the joints.
This material is perfect for a home yoga corner, a kids' play area, or a martial arts dojo where ground-based movements and falls are common. It is absolutely not the right choice for heavy weights, though. Dropping even a moderately heavy dumbbell can permanently dent or puncture a foam tile.
- Real-World Example: A home gym owner created a dual-purpose space by using EVA foam in their stretching and mobility zone while putting down heavy rubber mats in the area with the squat rack and weights. This targeted approach gives them the joint-friendly comfort they need for floor work and the impact protection they need for lifting, all in one room.
The right material really depends on the job it needs to do. This table breaks down the pros and cons to help you see what fits best for your space.
Gym Matting Material Comparison
| Material Type | Key Benefit | Best For | Durability | Average Cost |
|---|---|---|---|---|
| Vulcanized Rubber | Extreme durability & non-porous | Heavy free-weight areas, powerlifting, commercial gyms | Highest | High |
| Recycled Rubber | Great value & eco-friendly | General fitness, home gyms, functional training | High | Medium |
| EVA Foam | Cushioning & lightweight | Yoga, martial arts, play areas, stretching zones | Low | Low |
| PVC (Vinyl) | Easy to clean & chemical resistant | Cardio areas, studios, multi-purpose rooms (not for weights) | Medium | Low-Medium |
As you can see, rubber options provide superior durability for any area where weights are being dropped, while foam and PVC have their place in lower-impact settings.
This visual gives you a quick summary of how different materials stack up.
The data is clear: rubber consistently outperforms other materials like PVC in durability, making it the superior choice for high-impact zones, even when comparing thinner profiles.
The Rise of Specialized Materials
Beyond the big three, the market for exercise mats is booming. The yoga and exercise mat segment alone is projected to grow from $555.93 million in 2023 to nearly $1.42 billion by 2030.
This growth is being driven by a demand for mats that do more—and do it more sustainably. We're seeing more options made from biodegradable and recycled materials coming to market every year. This trend shows a growing awareness among consumers who care just as much about environmental impact as they do about performance when choosing their gym flooring.
Finding the Right Thickness and Density
When you're outfitting a gym, the flooring isn't just a surface—it's your first line of defense. Picking the right thickness and density for your matting is critical. It's what protects your subfloor from cracking, your expensive equipment from damage, and, most importantly, your members from injury.
It’s easy to get thickness and density confused, but they do very different jobs.
Think of thickness as the raw cushioning that absorbs the sheer force of a dropped weight. Density, on the other hand, is all about how well the mat holds its shape and resists being crushed under that load. A thick mat with low density might feel soft, but it'll "bottom out" under a heavy deadlift, offering almost no real protection. Conversely, a thin but super-dense mat will be stable, but it won't have enough give to absorb the shock of a heavy drop.
The sweet spot is finding the right balance between the two. That's how you create a workout space that's both safe and built to last.
Match the Thickness to the Movement
Using a single type of mat across your entire facility is a classic mistake. You either overspend on flooring for your cardio area or, far worse, you under-protect your heavy lifting zones. You've got to match the mat's specs to the specific impacts happening in each area for maximum benefit.
Here is a simple, actionable guide to selecting the right thickness:
- Cardio Zones & Light Dumbbell Areas (up to 8mm): For treadmills, ellipticals, and areas with lighter weights, an 8mm rubber mat is plenty. It's tough enough for constant foot traffic and provides a stable, easy-to-clean surface.
- Functional Training & HIIT (10-12mm): In zones where you have kettlebell swings, box jumps, and moderate weights hitting the floor, you need more cushion. Stepping up to a 10-12mm mat provides better shock absorption for this kind of dynamic movement.
- Heavy Free-Weight Areas (20mm minimum): This is where things get serious. For your squat racks, bench presses, and general heavy lifting zones, a minimum of 20mm is non-negotiable to protect your subfloor.
- Olympic Lifting & Powerlifting Platforms (30mm+): For dedicated platforms where fully loaded barbells will be dropped from overhead, 30mm or even 40mm is the professional standard. Anything less risks catastrophic damage to your concrete subfloor.
Why Density is the Unsung Hero
While thickness absorbs the big, dramatic impacts, density is all about stability and long-term performance. You'll notice that high-density rubber mats are much less likely to develop permanent indentations from heavy squat racks or leg press machines. This keeps your surface perfectly flat and stable, which is crucial for safe lifting.
A low-density mat might feel squishy and comfortable at first, but it can create an unstable base for heavy lifts. Imagine trying to hit a new PR on your deadlift while standing on a memory foam mattress—it’s a recipe for a rolled ankle or a dangerous loss of balance. High-density flooring provides that firm, connected-to-the-ground feeling that's essential for proper form and safety.
Real-World Example: A boutique HIIT studio opened in a mixed-use building with offices directly below. The owner made the smart call to install 30mm high-density rubber tiles. This wasn't just about protecting their own floor; it was a strategic move to deaden the noise and vibration for the tenants downstairs. The thickness handled the impact of dropped weights, while the density absorbed the sound. The benefit was avoiding noise complaints and maintaining a good relationship with their commercial neighbors.
Ultimately, choosing the right matting comes down to a clear-eyed assessment of the impact, stability, and environmental factors like noise in your facility. Investing in the proper thickness and density from day one will save you a world of headaches and ensure your flooring is a long-term asset, not a recurring problem.
Installation and Maintenance That Lasts
Picking out the best gym matting is a huge step, but that investment is only as good as the installation and care you put into it. Getting the setup right prevents problems like buckling or separating seams. Just as important, a smart maintenance routine keeps the material in top shape, ensuring your floor stays safe and solid for years to come. The direct benefit is extending the life of your flooring and maintaining a professional appearance.
How you install your flooring really depends on the product you choose. Interlocking tiles are a super popular, DIY-friendly option. They're perfect for home gyms or sectioning off smaller areas in a commercial facility. They just click together like giant puzzle pieces, which means a quick, tool-free setup and an easy fix if one tile ever gets damaged.
For bigger, wide-open spaces, rubber rolls give you that seamless, professional finish. This approach means fewer seams where dirt and chalk can build up, but it definitely requires more precision—and sometimes, calling in the pros is the smartest move.
Pro Tips for a Perfect Installation
A great installation is all about the prep work. Rushing the process is a surefire way to run into headaches down the road. One of the most critical—and most often skipped—steps is acclimation, especially when you're working with rubber rolls.
Expert Tip: Always let your rubber rolls acclimate to the room's temperature and humidity for at least 48 hours before you unroll and install them. This simple step prevents the material from expanding or contracting after it's laid, which is the number one cause of buckling and warping.
Here's a real-world example: A fitness studio owner was in a huge hurry and had their new rubber flooring installed the same day it arrived. Within a month, noticeable waves started appearing all over the floor as the rubber finally adjusted to the indoor climate. They had to pull up entire sections and re-lay them. It was a costly, disruptive mistake that could have been easily avoided.
Follow these actionable steps for a perfect installation:
- Clean the Subfloor: Ensure the floor underneath is completely clean, dry, and level before you start. Any debris left behind can create annoying bumps and uneven spots.
- Plan Your Layout: Do a dry run. Fit your tiles together or measure and mark your layout for rolls before you make a single cut or touch any adhesive. This helps you minimize waste and guarantees a clean, professional-looking job.
- Use the Right Tools: A sharp utility knife and a good straight edge are your best friends for cutting rubber matting cleanly and accurately.
Preserving Your Investment with Smart Maintenance
Once your floor is down, a consistent cleaning routine is non-negotiable. The goal isn't just to keep it looking sharp; it's to protect the material itself from breaking down. The gym mat market hit $2.19 billion back in 2021, which shows just how much facilities are investing in their infrastructure. Proper upkeep is critical to protecting that investment.
The biggest mistake is grabbing harsh, abrasive, or acidic cleaners. Chemicals like bleach or anything with ammonia will strip the protective finish from your mats, causing the rubber to become brittle and crack over time.
Instead, stick to this simple, effective routine:
- Daily: Sweep or vacuum to remove surface dust, chalk, and dirt.
- Weekly: Mop with a damp mop using a pH-neutral cleaner. This is gentle enough to lift away sweat and grime without damaging the mat's surface.
- After Cleaning: Always let the floor air dry completely before use to prevent slips and ensure hygiene.
This routine protects your flooring, extending its lifespan and saving on replacement costs. You can dive deeper into the specifics by checking out our guide on how to clean gym mats effectively.
Your matting is just one piece of the puzzle. To protect the longevity and safety of your entire gym, follow a comprehensive fitness equipment maintenance checklist. A holistic approach ensures every part of your facility stays in top condition.
Making a Smart Purchase Decision
Alright, you've waded through the technical specs and have a good handle on the materials. Now comes the moment of truth: placing the order. This is where the rubber literally meets the road, and a few smart moves right now can save you a world of headaches and a surprising amount of cash. Getting this part right ensures the flooring that shows up at your door is exactly what your gym needs.
A little precision here prevents big problems later. You don't want to end up with a pile of expensive leftover material or discover your warranty has more holes than a block of Swiss cheese.
Measure Twice, Order Once
The old carpenter’s saying is gospel when it comes to gym flooring. Ordering based on a rough guess is one of the single most expensive mistakes you can make. You need an accurate, detailed floor plan.
- Real-World Example: A home gym owner was converting a 150-square-foot garage. Instead of just buying 150 square feet of rubber, he took the time to sketch out the room, marking the exact spots of support columns and a built-in workbench. His detailed plan showed he only needed 135 square feet of actual matting. By ordering the precise amount, he saved over a hundred dollars and avoided the miserable job of trying to cut around obstacles with leftover pieces. The benefit was a cleaner installation with less waste and lower cost.
Always Request a Sample
Never commit to a large order without getting your hands on a physical sample first. Product photos and slick descriptions can only tell you so much. Feeling the material is the only way to truly understand its density, texture, and flexibility.
A sample is an actionable tool that lets you:
- Feel the Density: Is it rock-solid and stable enough for heavy deadlifts, or does it have a spongy feel that won't work?
- Check the Texture: Does it have the right amount of grip for the activities you have planned?
- Test the Durability: Go ahead, scratch it with a key. Bend it. A quality rubber mat should be impressively resilient.
This small step provides massive confidence in your final decision. It’s your insurance that the product you’re buying actually matches the quality you expect.
Questions to Ask Your Supplier
Before you hit that "buy" button, it's time to vet your supplier. How a company handles logistics and stands by its product is every bit as important as the mat itself. Having a checklist of questions ready will save you from nasty surprises down the line.
Key Insight: A reputable supplier will have clear, confident answers to these questions. If you get vague responses about shipping or warranties, that’s a huge red flag. It might be time to look elsewhere.
Here’s an actionable checklist of what you need to ask:
- Shipping and Delivery: "How is the matting delivered? Does it come on a pallet, and is liftgate service included? Will I need any special equipment to unload it?" Benefit: This prevents unexpected delivery costs and logistical nightmares.
- Warranty Specifics: "What, specifically, does the warranty cover? Does it include premature cracking or crumbling? What’s the claims process like?" Benefit: This clarifies your long-term protection.
- Return Policy: "If I over-order, what’s your return policy for uncut rolls or unopened boxes of tiles?" Benefit: This can save you from being stuck with hundreds of dollars of unused product.
Asking these direct questions shifts you from being a passive buyer to an informed one. You’ll know exactly what to expect, making the whole process—from purchase to installation—go smoothly. If you're looking into more specialized flooring, like industrial anti-fatigue mats, their logistics can be different, so this diligence is even more critical. A little effort now ensures you find the best gym matting for your space, with zero regrets.
Common Questions About Gym Matting
Even with the best-laid plans, a few last-minute questions always seem to surface right before you pull the trigger on new flooring. Getting those final details ironed out is the key to choosing your gym matting with total confidence. Here are practical answers to the most common questions we get asked.
Can I Install Rubber Gym Matting Over Carpet?
This is easily one of our most frequent questions, and the answer is a hard no.
Laying heavy rubber mats on top of a soft carpet creates an unstable, spongy foundation. That squishiness is a huge safety hazard for anyone doing squats, deadlifts, or any exercise where solid footing is critical.
- Actionable Advice: The only safe way to do this is to tear out the old carpet completely. Then, install your gym matting directly onto a hard, level subfloor like concrete or plywood. This ensures a stable and safe surface.
On top of that, carpet is a moisture trap. Any spilled water or sweat will get caught between the mat and the carpet below, creating a perfect recipe for mold and mildew.
What Is the Difference Between Vulcanized and Recycled Rubber Mats?
The real difference comes down to how they're made and what that means for performance.
Vulcanized rubber is brand-new, virgin rubber cured with intense heat and pressure. This process creates an incredibly dense, non-porous surface.
- Benefit: It’s more durable, won't absorb liquids, and is easier to keep hygienic, making it ideal for high-use commercial gyms.
Recycled rubber is the eco-friendly option, made from reclaimed materials like shredded car tires that are bound together with an adhesive.
- Benefit: It’s a fantastic, budget-conscious choice that still offers excellent protection. However, it is slightly more porous, meaning it might hold odors longer and show wear a bit sooner after many years of heavy commercial abuse.
How Do I Get Rid of the Smell from New Rubber Mats?
That distinct rubbery smell is normal. It’s a process called off-gassing, where volatile organic compounds (VOCs) from the manufacturing process are released. While not harmful, it can be strong at first.
Actionable Tip: To get ahead of the smell, give the mats a good cleaning with a pH-neutral cleaner and warm water as soon as they're installed. Then, get the air moving. Open up windows, turn on fans, and let the space breathe. The odor usually fades away within a week or two.
What Is the Best Way to Clean Gym Mats?
Good cleaning habits will make your investment last. The number one rule? Stay away from harsh chemicals. Bleach, ammonia, and acid-based cleaners will destroy the rubber over time, making it brittle and causing it to crack.
We cover maintenance best practices in more detail in our guide to the benefits of anti-fatigue rubber mats, but here’s a simple, actionable routine that works for most gym flooring:
- Daily Sweep: Grab a broom or vacuum to get rid of the daily buildup of dust, dirt, and chalk.
- Weekly Mop: Use a mop with a simple solution of water and a pH-neutral cleaner to wipe the surface down.
- Air Dry: This is critical. Let the mats air dry completely before anyone uses them again. This prevents slips and keeps moisture from sitting on the surface.
This straightforward process is all it takes to keep your gym flooring looking and performing its best for the long haul.
Ready to build a foundation that protects your members, equipment, and facility? Explore the wide range of high-performance gym matting solutions at Mats4U. From durable rubber rolls to versatile interlocking tiles, we have the perfect flooring to match your mission. Visit us today at https://www.mats4u.com to find your ideal matting and get a free quote.


