

Think of heavy-duty floor protection less as a job site expense and more as insurance against costly disasters. Skipping this crucial step is a gamble you can't afford to take. One dropped wrench or a single paint spill can wipe out your project's profit margin and throw your entire timeline into chaos. This guide will walk you through exactly how to select, install, and manage floor protection to safeguard your work and your bottom line.
Why Smart Floor Protection Is a Critical Investment
Failing to properly protect floors during a build or renovation is a common but painful mistake. The cost of fixing or replacing a damaged floor will always outweigh what you would have spent on a quality protective covering. This isn't just about preventing scratches—it's about protecting your budget, your professional reputation, and your project schedule.
Real-World Example: Imagine a commercial office renovation. A crew is installing new light fixtures directly above a brand-new, high-end hardwood floor. To save time, they skip laying down protective boards, figuring they can just be extra careful. A single dropped wrench leaves a deep gouge that's impossible to buff out.
The result?
- Direct Cost: A $4,500 repair bill to replace several planks.
- Indirect Cost: A two-day delay while everyone waits for the flooring contractor, pushing back the entire project handover.
- The Takeaway: This expensive mess could have been avoided with a few sheets of heavy-duty protection, costing a fraction of the repair.
How Proactive Protection Directly Benefits You
Investing in the right floor covering delivers tangible returns from day one. It’s a non-negotiable part of any professional job, whether you're working on a luxury condo or a busy warehouse. The benefits are crystal clear:
- Safeguard Valuable Surfaces (Reduced Costs): Shield expensive materials like hardwood, polished concrete, tile, and vinyl from scratches, gouges, paint spills, and heavy impacts. This prevents repair bills that eat into your profits.
- Enhance Site Safety (Increased Safety): A stable, anti-slip cover reduces trip hazards from loose debris or uneven ground, making the whole site safer for your team and minimizing the risk of workplace injuries.
- Keep Projects On Schedule (Improved Efficiency): By preventing accidents and the rework that comes with them, you avoid unexpected delays and keep the project moving smoothly toward completion.
This proactive approach is fast becoming standard practice. The global heavy-duty temporary floor protection market was valued at around USD 1.2 billion in 2023 and is projected to nearly double to USD 2.3 billion by 2032. You can dig into the numbers and see what's driving this growth over on Dataintelo.com.
Actionable Takeaway: Shift your mindset. View floor protection as an essential tool, just like your safety gear or power drill. This proactive approach is the hallmark of a professional who plans for success from the ground up, preventing problems instead of reacting to them.
Matching Protection to Your Project's Demands
Before you spend a single dollar, you need a plan. Picking the right heavy-duty floor protection isn't about grabbing the thickest roll; it’s a strategic decision that balances risk, duration, and budget. By asking the right questions upfront, you can create a clear "protection profile" for any job. This ensures you get precisely what you need without overspending or risking expensive damage.
The first step is a simple 3-part assessment:
- What is the surface?
- What is the traffic?
- What is the timeline?
How to Assess Your Surface and Traffic
The type of floor you’re protecting is everything. What works for a tough concrete slab in an industrial warehouse can be a disaster on freshly finished hardwood that still needs to breathe.
Real-World Example: Using a self-adhesive plastic film on uncured epoxy is a classic mistake. While perfect for protecting low-pile carpet from paint overspray, on new epoxy, it will trap moisture and solvents, ruining the finish and forcing a complete re-do.
Next, be realistic about the traffic. Foot traffic from a painting crew is one thing. A 5,000-pound scissor lift rolling across the floor is something else entirely.
Here's how to apply this thinking to two different scenarios:
-
Scenario 1: Hospital Renovation.
- Surface: Vinyl or tile.
- Traffic: Foot traffic, rolling medical carts, dropped tools.
- Primary Risks: Impact damage and dust control.
- Actionable Solution: Use a thick but manageable board product that is easy to clean and won't create a trip hazard. This ensures staff can still move through the site safely.
-
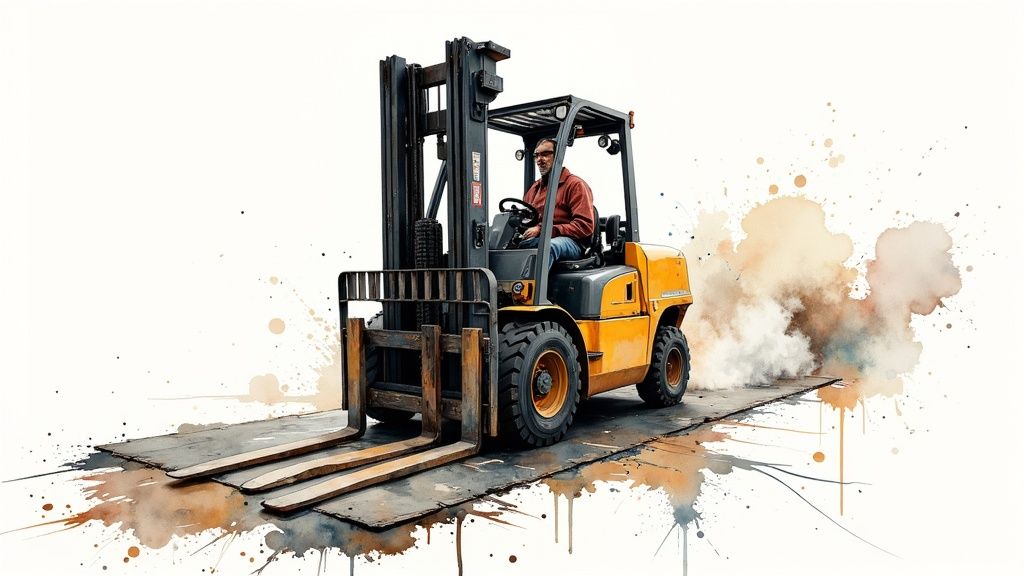
Scenario 2: New Warehouse Build.
- Surface: Cured concrete.
- Traffic: Forklifts, heavy pallets, constant foot traffic.
- Primary Risks: Abrasion, punctures, and heavy-duty wear.
- Actionable Solution: Choose an extremely durable product, like a 40-mil thick protective shell, designed specifically to withstand heavy machinery and prolonged use.
Actionable Takeaway: Match the protection's strength to the job's true risk level. Overprotecting a low-risk area wastes money, but under-protecting a high-traffic zone is an open invitation for costly repairs and delays.
How to Evaluate Your Project Timeline
Finally, how long does the protection need to last? A weekend paint job and a six-month new construction build require different strategies.
- For Short-Term Projects (1-3 days): A cost-effective builder’s paper might be sufficient. It provides a basic defense against light spills and scuffs without a large upfront investment.
- For Long-Term Projects (weeks or months): You need a solution built for longevity. A robust paperboard, often 2.5 times thicker than standard builder's paper, offers the durability to withstand extended foot traffic and equipment without needing replacement.
Choosing a product designed for the correct duration saves you the headache and cost of re-application and ensures you have reliable protection from start to finish.
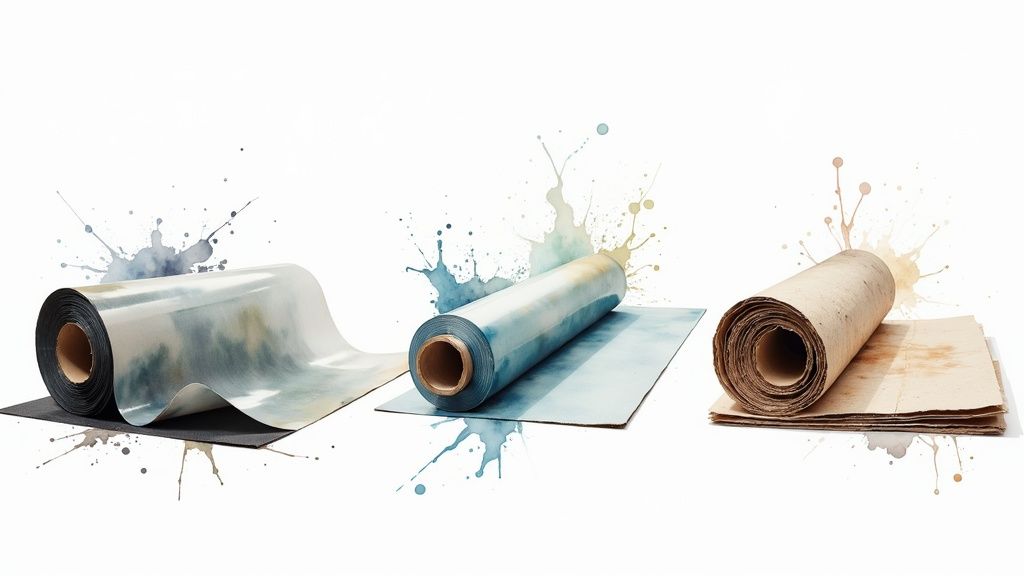
Choosing the Right Floor Protection Material
Once you've mapped out your project's needs, it's time to pick your material. This is where many projects get derailed. Matching the right heavy duty floor protection to your needs isn't just about preventing damage—it's about making your workflow and budget smarter.
The market is flooded with options, but getting a handle on the pros and cons of each category is your ticket to a smart, cost-effective decision. The temporary floor protection market was valued at a hefty USD 1,017.04 million in 2023 and is expected to hit USD 1,456.41 million by 2031. If you're interested in the numbers, you can read the full market analysis here.
Comparing Top Material Choices
Let's break down the most common materials to see where they shine—and where they'll let you down.
-
Corrugated Plastic Boards: The workhorse for high-impact, high-traffic jobs.
- How to Use It: Ideal for sites with rolling scissor lifts, heavy tool carts, and pallet jacks. Their reusability makes them a sound investment for contractors juggling multiple projects.
- Benefit: Lightweight, waterproof, and offers top-notch impact resistance.
-
Heavy-Duty Paper and Boards: The go-to for breathability.
- How to Use It: Essential for newly cured concrete, sealed hardwood, or any surface that needs to breathe.
- Real-World Example: A contractor once used a plastic film on newly cured concrete, trapping moisture and causing the finish to bubble and discolor—a complete, preventable disaster. Now, he only uses breathable paper on new pours to avoid this costly mistake.
-
Self-Adhesive Films: Best for low-impact, specific tasks.
- How to Use It: Perfect for protecting carpets from paint splatters, dust, and light foot traffic.
- Warning: A terrible choice for hard surfaces where heavy items are moved. They tear easily and offer almost no impact protection.
To help you visualize the trade-offs, here’s a handy chart.
Heavy Duty Floor Protection Material Comparison
| Material Type | Best For | Impact Resistance | Liquid Resistance | Key Benefit |
|---|---|---|---|---|
| Corrugated Plastic | High-traffic construction, heavy equipment | High | High (Waterproof) | Lightweight and reusable |
| Heavy-Duty Paperboard | Hardwood, tile, cured concrete | Medium | Medium | Breathable and recyclable |
| Self-Adhesive Film | Carpets, low-traffic areas | Low | High (Spill-proof) | Easy to apply and remove |
| Rubber Mats/Runners | Entrances, long-term site protection | High | High (Waterproof) | Extremely durable and slip-resistant |
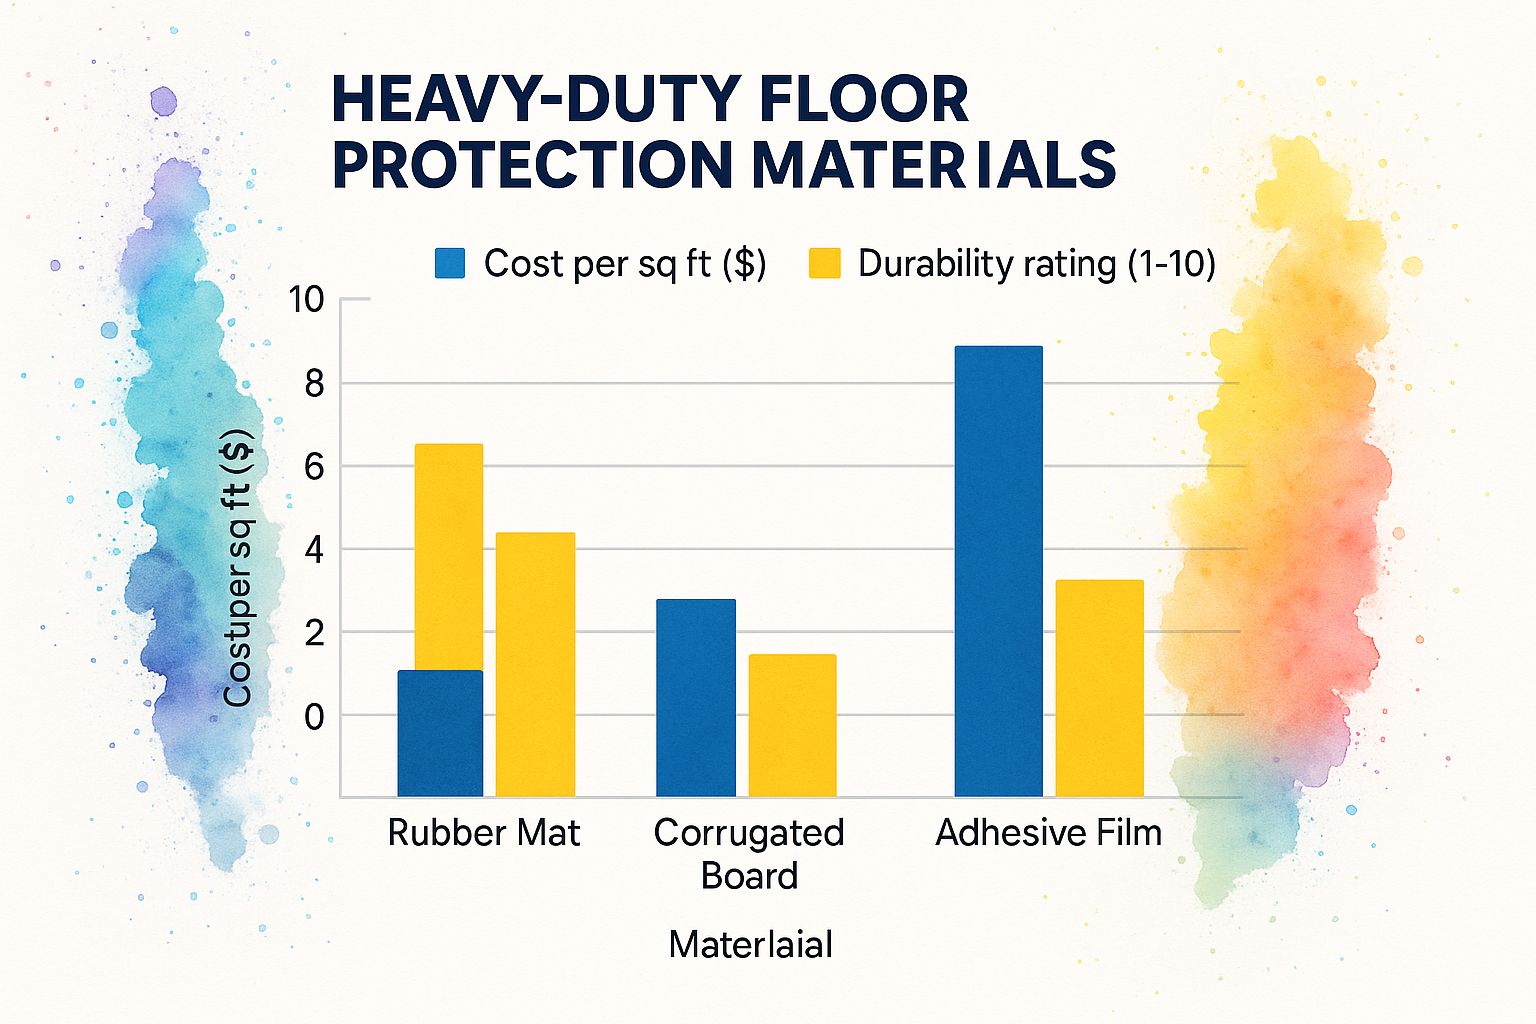
The data tells a clear story: while budget-friendly films have their place, their durability is limited. At the other end, rubber mats provide maximum durability but come with a higher initial cost.
Deciding Between Reusable vs. Disposable Solutions
This decision balances upfront cost against long-term value.
- Reusable Options (e.g., rubber runners, plastic boards): These have a higher initial cost but pay for themselves over time. They are the go-to for companies that tackle similar jobs repeatedly. Specialized products like those built to trap water can be a lifesaver for keeping a site clean. Learn more by checking out our guide on what to know about Waterhog floor mats.
- Disposable Options (e.g., paper, adhesive films): These have a low upfront cost and are ideal for one-off jobs or specific tasks like painting.
Actionable Takeaway: Match your choice to your business model. If you're a painter doing short-term residential jobs, adhesive films and paper are likely your best bet. If you’re a general contractor managing long-term commercial builds, investing in reusable boards is the smarter financial play.
Installation Techniques for Maximum Effectiveness
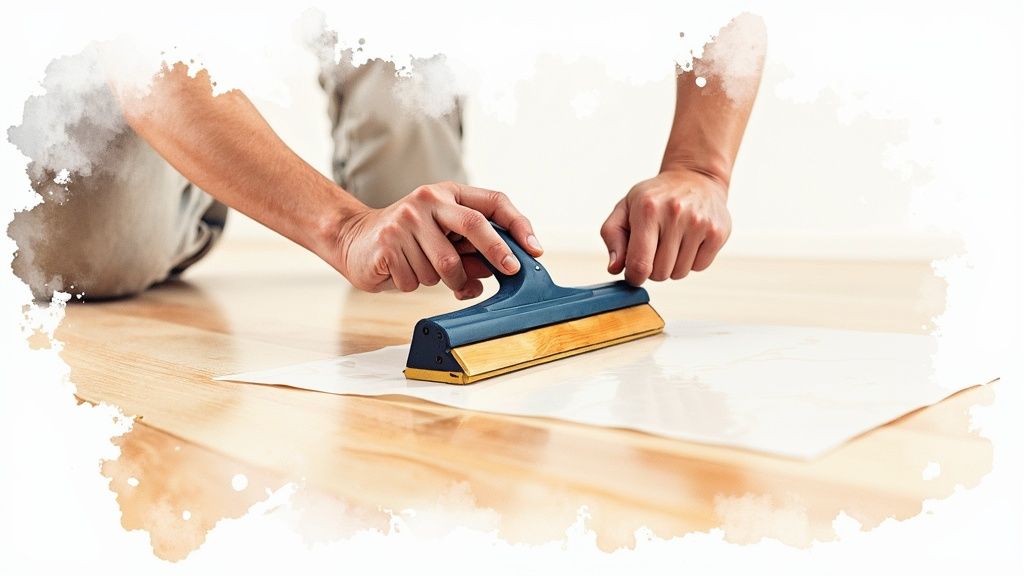
Choosing the right material is only half the battle. How you install your heavy duty floor protection determines its success. A sloppy installation with gaps and curled edges defeats the purpose and creates new hazards. A professional-grade installation is achievable by following a few key steps to create a seamless, liquid-proof barrier.
How to Master Your Measurements and Layout
Accurate measurement is the first step to a clean installation. Before you cut anything, measure the entire space to map out your layout and minimize waste.
Here is a step-by-step process for an efficient layout:
- Measure the Room: Get the full dimensions to plan your cuts.
- Start in the Farthest Corner: Begin laying your protection in the corner of the room farthest from the exit.
- Work Toward the Exit: Continue laying down protection as you move toward the door. This simple strategy prevents you from walking over the clean, newly laid material and tracking in dirt.
How to Create a Liquid-Proof Seal
Seams are the weak point of any floor protection system. This is where spills seep through and edges curl up, creating trip hazards.
Follow these steps for a robust, liquid-proof seal:
- Overlap Generously: Overlap each sheet or board by at least two inches. This creates a crucial margin of error for spills.
- Tape the Seams, Not the Floor: This is the golden rule. Always tape the protection to itself, not to the finished floor. Apply a quality tape directly over the seam, connecting one board to the next. This creates a unified "floating" surface that won't shift or damage the floor underneath.
- Choose the Right Tape: For taping seams, use a durable, construction-grade tape. If you must tape to a surface (like a baseboard), use a low-tack, residue-free painter's tape designed for delicate surfaces.
The demand for high-quality flooring fuels the need for better protective measures. Projections show the heavy-duty temporary floor protection market in Western Europe and North America growing from USD 592.55 million to USD 875.49 million between 2023 and 2031. You can discover more about this market growth and see why proper installation is crucial.
Real-World Example: On a luxury apartment project, a contractor used generic duct tape to secure floorboards to a brand-new luxury vinyl tile (LVT) floor. When the tape was removed, it pulled up the finish and left a sticky residue. This mistake resulted in a costly professional cleaning bill and delayed the project by a full day. The correct method—taping the boards to each other—would have prevented this.
This same care should be applied at every entrance. A properly selected mat can drastically reduce dirt tracked inside. For more on this, read our guide on how to choose an outdoor entrance mat to create a complete site protection system.
Keeping Your Protection Intact and Removing It Cleanly
Your job isn't done just because the protection is down. To get the most out of your heavy duty floor protection, you must maintain it throughout the project and have a smart plan for removal. Ignoring it creates a false sense of security that can lead to expensive, last-minute repairs.
How to Perform Daily Upkeep and Spill Control
Daily walk-throughs are non-negotiable, especially in high-traffic zones. A five-minute scan at the end of each day for tears, punctures, or curling seams lets you catch small issues before they become big problems. A quick patch with the right tape can stop a spill from reaching the finished floor.
Here’s how to handle spills effectively:
- Clean the Spill Immediately: Don't just wipe it up.
- Inspect Underneath: Lift the edge of the protector to ensure nothing seeped through a seam or tear.
- Patch if Necessary: If there's a tear, clean the area and patch it with tape to prevent future issues.
Real-World Example: On a project with a new epoxy floor, a crew laid down protection but didn't spot a small rip caused by a heavy tool cart. Later, a dropped screwdriver punched right through that tear, gouging the epoxy.
The Takeaway: That incident could have been avoided. A quick daily check and a small piece of tape would have saved thousands in repair costs and a very awkward client conversation. Maintenance isn't just a chore—it's a critical part of the protection process.
A clean site starts at the front door. To learn how to build a complete, site-wide protection strategy, read our guide on selecting effective entrance floor mats.
The Art of a Clean Removal: A Step-by-Step Guide
When the project is done, how you remove the protection determines how clean your handover is. Ripping up boards sends a cloud of dust over every surface you just perfected.
Follow this methodical process for a cleaner removal:
- Sweep or Vacuum First: Before lifting anything, thoroughly sweep or vacuum the entire protected surface to remove the bulk of dust and debris.
- Roll, Don't Rip: Start at one end of the room and carefully roll the protection inward on itself. This technique traps any remaining dust inside the roll instead of kicking it into the air.
- Work Your Way Out: Just like installation, start removing the protection from the point farthest from the exit. Work toward the door so you aren't tracking dirt across the freshly revealed, clean floor.
This systematic approach contains the mess, saves cleanup time, and ensures the floor you worked so hard to protect looks perfect.
Common Questions About Floor Protection
Even seasoned pros have questions. Getting the right answer fast can be the difference between a smooth project and a costly mess. Here are a few of the most common questions about using heavy duty floor protection, with practical, field-tested answers.
Can I Reuse Heavy Duty Floor Protection?
It depends entirely on the material and its condition.
- Reusable Materials: Thick, corrugated plastic boards or heavy-duty rubber runners are designed for multiple uses. After a job, inspect them carefully for deep cuts, punctures, or chemical contamination. If they pass inspection, clean them, let them dry, and store them flat to maximize your investment.
- Disposable Materials: Self-adhesive films and most standard builder's papers are strictly one-and-done. They lose their protective qualities once removed and should be discarded.
Actionable Takeaway: Never reuse a damaged protector, no matter how tough it was originally. A board with a hidden crack can fail under a heavy load, and a torn mat is a trip hazard. The small savings are not worth the risk of floor damage or injury.
What Is the Best Protection for Newly Finished Floors?
When working around a surface that’s still curing (like freshly coated hardwood or sealed concrete), your top priority must be breathability. You need a material that allows solvents and moisture to escape.
- What to Use: A high-quality, breathable paper product, such as a thick, durable paperboard. It is tough enough for foot traffic but porous enough to let the floor cure naturally underneath.
- What to Avoid: Steer clear of any non-porous materials like plastic films or poly-coated papers. They will trap moisture against the finish, leading to bubbling, discoloration, or permanent damage.
How Do I Secure Protection Without Damaging the Floor?
The wrong tape can pull the finish right off a surface. The professional standard is to tape the protection boards or sheets to each other, never to the floor.
Here's the step-by-step method:
- Overlap the edges of your protection boards by a few inches.
- Run a high-quality, strong tape along the seam, connecting the boards.
- This creates a single, "floating" surface that stays put without any adhesive touching the finished floor.
If you must tape to a surface like a baseboard, use only a low-tack painter's tape rated for delicate surfaces and check the manufacturer's guidelines for how long it can be safely left in place. For a complete rundown of options, our guide on choosing the right floor mat for your needs can help you find the perfect solution.
Ready to find the perfect heavy duty floor protection for your next project? The experts at Mats4U have the knowledge and selection to help you safeguard your valuable surfaces, enhance site safety, and keep your job on track. Explore our collection of commercial and industrial matting solutions today!


